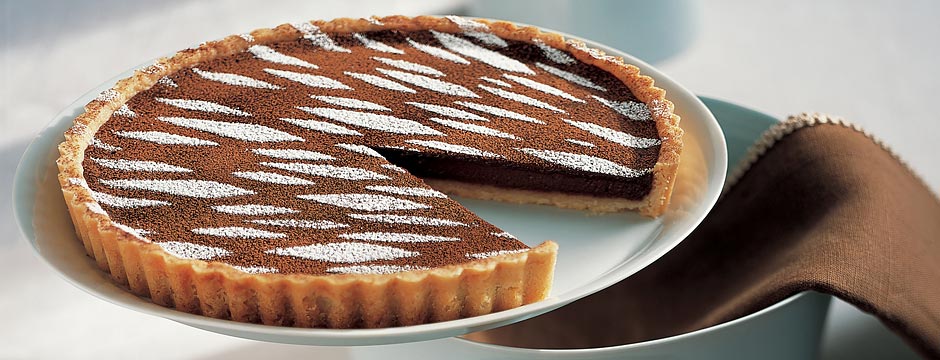
Warm Mocha Tart

Blog

Crabby When Wrong

January 20th, 2012 by Alice Medrich

“I may be wrong but” is one of the ways I preface a statement when I really think I’m right but trying not to be too obnoxious.  Which is probably fairly obnoxious…
For years I’ve cooked Dungeness crabs in plain boiling water, no spices (horrors) and no salt.  The crabs are always stunningly delicious and sweet.  Divine really. But meanwhile my fishmonger, Paul Johnson (owner of Monterey Fish and author of 2008 IACP Cookbook of The Year, Fish Forever) insists that lots of salt in the water is really important.  I’ve been nagged by cognitive dissonance—I think Paul is fantastic AND I think my boiled crabs are fantastic.  I finally decided to test.  I bought two crabs—lets not tell Paul that all of the crabs at Monterey Fish were spoken for on the day I woke up with this bee in bonnet, and so I had to buy them across town… 
I boiled two big pots of water.  Into one pot I measured exactly ¼ cup of sea salt for each gallon of water, so you (or Paul) couldn’t say I didn’t do it exactly right. 
I took photos of the pots of boiling water and the crabs, so that when I turned out to be right, I could post the story with photos. 

The crab cooked in unsalted water was divine, just as I thought. 
But the crab cooked in salted water was a little bit more divine. 

Okay.  Okay. 
I’m posting anyway. 

Sinfully Easy

January 11th, 2012 by Alice Medrich

Everyone needs a sinfully easy dessert list.  What would be on yours?
I was invited to a dinner party set for the day after I would return from a trip. When I offered to bring dessert my hosts were okay with that. When I said it would be something super quick and easy, they were okay with that too.  I made Bittersweet Chocolate Soufflés and EVERYONE was extremely okay with that! The soufflés—always effortlessly impressive—were fantastic, even though the oven was accidentally turned off during the first half of the baking. Talk about sinfully easy and forgiving!
The recipe is from my book, Bittersweet, but you’ll find loads more sinfully easy desserts in a new book coming this May:
 Sinfully Easy Delicious Desserts: Quicker Smarter Recipes by Alice Medrich.

Sinfully Easy is loaded with recipes that don’t require baking and plenty of easy ideas for dessert that—unlike the chocolate soufflé—actually sound like they are quick and easy.  You’ll find fun things to do with vanilla ice cream or fresh cheeses or strawberries; modern fruit desserts, new granitas, ice creams made without an ice cream machine, creamy dreamy puddings etc. But you will also find recipes— for soufflés and tarts and pies and even a torte or two— that you might not expect in a book meant for cooks in a hurry, cooks with small kitchens, beginners, or self proclaimed bake-ophobes, not to mention great cooks who just don’t like to make dessert!  
I know I’m stubborn.  I am certain that if people knew how easy it is to make say, sour cream Soufflés laced with chocolate, or a chocolate tweed torte, or a lemon or blueberry tart, they would add it to their personal “Sinfully Easy” dessert list along with all of the more obvious things. The recipes in Sinfully Easy are simple but clear and complete enough so that anyone can be successful making them, and none require a rolling pin, pastry brush, loads of counter space, or a million steps.  No rocket science, just great desserts.  I revised and streamlined some favorite recipes too: Did you know that you could make a classic Queen of Sheba Torte in one bowl without separating the eggs? Did you know that you could mix a delicious plain vanilla butter cake, or Fresh Ginger Gingerbread, or even an incredibly buttery spicy Linzer Torte in a food processor?  I do and you can.
Sinfully Easy Delicious Desserts comes out in May.  Meanwhile try the chocolate soufflésthat I made while jet lagged and add them to your sinfully easy dessert list.

BITTERSWEET CHOCOLATE SOUFFLES
Adapted from Bittersweet: Recipes and Tales from a Life in Chocolate

Ingredients:
Butter and sugar for the ramekins

8 ounces bittersweet 70% chocolate

1 tablespoon (.5 ounce) unsalted butter

1/3 cup milk

3 large eggs, separated, at room temperature

1 large egg white, at room temperature

1/8 teaspoon cream of tartar

1/3 cup (2.3 ounces) sugar

Lightly sweetened whipped cream, whipped crème fraiche, or a combination

Special Equipment:

Seven to eight 4-5 oz ramekins

If you are baking the soufflés right away, position a rack in the lower third of the oven and preheat to 375 degrees. Butter the ramekins lightly but thoroughly and coat them with sugar (see tip).

Place chocolate, butter, and milk in a large stainless steel bowl set in a wide skillet of barely simmering water. Stir until the chocolate is melted and the mixture is smooth.  Remove the bowl from the water bath and whisk in the egg yolks. (Don’t worry if the mixture stiffens slightly or is less than perfectly smooth at this point). Set aside.

Beat the egg whites and cream of tartar in a clean dry mixer bowl at medium speed until soft peaks form when the beaters are lifted. Gradually sprinkle in the sugar and continue to beat, at high speed, until egg whites are stiff but not dry. Fold 1/4 of the egg whites into the chocolate mixture to lighten it and then fold in the remaining egg whites. 

Divide the mixture evenly among the prepared ramekins, filling each 3/4 or more full. (Soufflés may be prepared to this point, covered, and refrigerated up to two days. Bake directly from the refrigerator)

Place the soufflés on a cookie sheet. Bake until they rise and crack on top and a wooden skewer plunged into the center emerges slightly moist and gooey, 14-16 minutes.  Remove from the oven, sieve a little powdered sugar over the top and serve the soufflés immediately. Pass a bowl of whipped cream to top the soufflés.

Serves 7 to 8.

Tip: The best way to sugar the cups is to butter all of them first, then add a couple tablespoons (a handful) of sugar to one ramekin. Shake and turn the ramekin sideways and then rotate it until coated.  Pour excess sugar into the next cup, tapping it to dislodge loose sugar.  Repeat with the remaining ramekins.  Add more sugar if necessary.

Poached Eggs Hold The Vinegar

January 4th, 2012 by Alice Medrich

I do love poached eggs. I eat one almost every day for weeks on end before I decide to take a break, and after a while I start up all over again. I eat them plain on whole grain or levain toast year round with or without asparagus in spring, tomatoes and basil in summer, and wild mushrooms in fall.
I also love vinegar. My vinaigrette errs on the tangy side but I’m okay with that.
Though I love it, I never ever add vinegar to egg poaching water! Here’s how I see it:

The usual problem with eggs is that the whites often end up too firm or tough by the time the yolks are ready. This is because egg whites are mostly protein, and protein starts to set (coagulate) as soon it meets heat. Yolks cook slower to begin with, and even more slowly when they are surrounded by their whites. Adding vinegar to poaching water makes the whites firm even faster to prevent them from dispersing in the water. But that extra firmness comes with a slightly grainy texture and an odd flavor. I want my poached eggs with lovely tender yolks and whites. So I say, hold the vinegar.
With or without vinegar, a little bit of each egg white always floats alway from the yolk and it may look a little messy at first, but most of it stays cuddled up with its own yolk as the egg cooks. When you lift the egg from the water, just trim any minor ragged edges between the edge of the spoon and the side of the pan and voilà! A shapely oval poached egg without vinegar or even swirling the water into a whirlpool.

I poach eggs in a wide shallow pan rather than a deep saucepan and I turn the heat off under the pan as soon as the eggs are in the water. The fresher the egg, the more it holds it’s shape: I love a fresh farm egg, but ordinary supermarket eggs also work quite nicely.
Should you want the taste of good vinegar on your eggs, by all means drizzle a little over them after they are cooked. That way you can have your perfect tender poached eggs and your vinegar too.

POACHED EGGS MY WAY
Perfect poaching is harder to write about than it is to execute. Poach one or two eggs for yourself in a small skillet for a few days running until you get the hang of it, and fine-tune the timing to your taste. You’ll learn to gauge doneness how tender and quivery the whites look when you lift the egg from the water. You can always change your mind mid-lift; just lower the egg back in the pan for another 30 seconds or so.

Here’s what you need:
Eggs
Toast

A skillet and cover: 8-inch for 1 – 3 eggs or 12-inch for 4 – 10 eggs

A large slotted spoon with generous-sized holes

A clean folded tea towel or a couple folded paper towels
Here’s what to do:
Fill the skillet with at least 1-¼ inches of water and bring it to a simmer.
If you are nervous, you can start with training wheels and break all of the eggs into separate cups before you start. (Soon you won’t need the cups.)

When the water is simmering crack one egg (or pick up one of the “training” cups). Starting at the 12 o’clock position over the pan: hold the egg very close to the surface of the water before letting it slip in. Don’t drop the eggs from a height—this is not a parachute jump or Liberace at the piano. Moving clockwise without delay, continue adding eggs to the water. The last egg or eggs can go in the center of the pan if necessary. The eggs may seem as though they are not holding shape, but don’t panic. When all of the eggs are in the water, turn the burner off and cover the pan. Leave the lid slightly ajar if the skillet is filled to brimming; otherwise, cover it completely.

Three to 4 minutes after adding the first egg, slip the slotted spoon under it and trim any ragged edges by pressing the edge of the spoon against the side of the skillet. Lift the egg from the water and nestle the spoon into the folded towel to absorb excess water; tilt the spoon into the towel to coax even more water from the egg (because nobody likes watery eggs) before sliding the egg onto a piece of toast. Continue clockwise, trimming, lifting, blotting, and setting the eggs on toast. The last egg out should be the last egg in. That’s all!

Want to see a photo? Check out my post From February 27, 2011.